Printing of contact sheets aren’t so difficult to wrap your head around as you may first imagine. A contact sheet provides you with a positive print of the negative film. This print then allows you to choose your favourite image to make professional prints. Contact sheets don’t need to be perfect as they are meant to be a guide – a type of index for your prints.
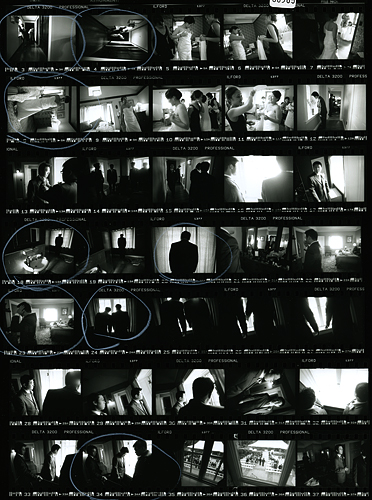
Contact Sheet Example
Before starting you need to the following:
- Place a clear glass holder on to the table directly below the light of the Enlarger.
- Open the aperture on the Enlarger fully so it is at its brightest setting then take it down 2 clicks.
- Move the Enlarger (up or down) to make sure that the light fits the entire glass holder so when it comes to exposing the photographic paper it won’t be missing a few important images.
- Focus the light from the Enlarger so that the sides are clear and crisp, you can usually find a dial on the side of the Enlarger head to fine tune the focus.
Now you are ready to begin, but before you take the photographic paper out of it’s container remember to turn the light off because if you don’t the paper will become overexposed and the print will be ruined.
- Lay a sheet of photographic paper down, with the shiny side facing up.
- Lay the negatives on top of the paper (you don’t need to take them out of their plastic sheet holders) making sure that the emulsion side is facing down, that is you should have shiner side facing up and the dull side in contact with paper.
The light will expose the paper through the negatives and create a positive image – the black parts of the negative become white and the white become black. - Clip the glass holder back together this will make sure that the entire contact sheet is as focused as you took them.
- Set the timer on the Enlarger for 5 seconds and use a card to make approximately 4 strips of different light intensities, leaving a 5 seconds gap between each.
Once all of the above is complete, take the print to a light source and see what the best exposure time is remembering the lighter the contact sheet strip the less time the strip has been exposed for. Choose the best exposure rate (or the time in-between two strips if you think it is more appropriate) and go back into the darkroom and expose a whole sheet at the selected time, going back over the steps 1 to 4 but at step 4 set the time to the chosen exposure rate.
