I have got very little experience in processing a black and white film while I was studying for my A Level in Photography at Farnborough Sixth Form College and therefore I had much to master at Southampton Solent University to get even slightly proficient at it. I have created this blog as a memory aid for me but it may help you too!
The basics – what equipment do we need?
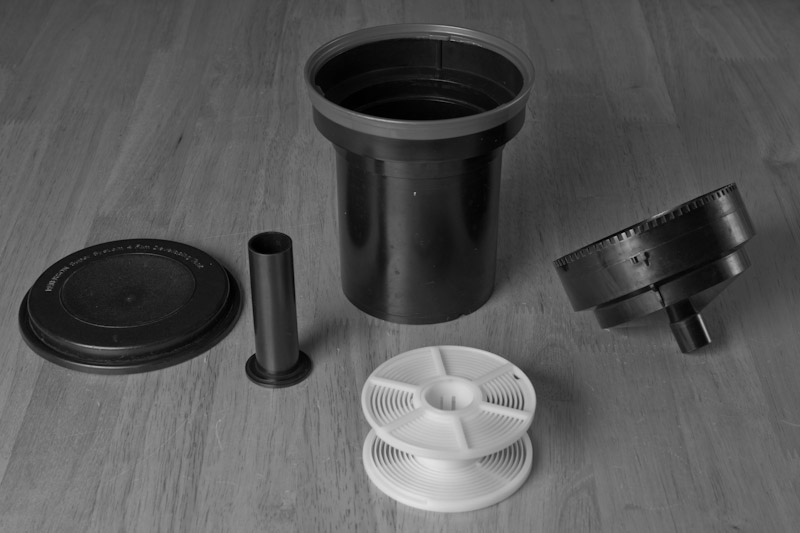
- * A light-tight development tank
- * A funnel lid for the tank – this helps keep light from getting in and exposing the film inside whilst the funnel part provides a way of pouring chemicals into the tank while maintaining a light tight environment.
- * A tank lid – which stops the chemicals from spilling when the tank is inverted
- * A film reel
- * A stand to place the reels of film on (so as to prevent them from falling over inside the tank when the chemicals are being moved around).
Securing the Film into the Development Tank
- Load the film onto the reel – this must be done in complete darkness, else the film will become exposed and become useless when making prints from the film.
- Place the reel with the film into the development tank remembering to use the stand to keep the film upright.
- Place the funnel lid onto the development tank and screw it on making sure it is secure. The chemical development process can now begin…
Before starting remember these chemicals can hurt and maybe toxic so the safest way to go is put on an apron and gloves to stop the chemicals from getting to your skin and clothes and to make sure you don’t bend over and sniff the chemicals this would most likely help as well.
Processing Overview (Developer->Wash->Fix->Wash->Dry)
- Measure 300ml of developer and 300ml of water into a jug and make sure the mixture’s temperature is at 21oC.
- Pour the developer/water into the tank and secure the tank lid on top. Tip the tank from side-to-side for the first 20 seconds then tip once every minute for 5 seconds and time the whole process for approximately 13 minutes. The timings might be different depending on the film type.
- When the time is up pour the developer away and wash out the left over chemicals with water (remember don’t lift off the cap because the film can still become exposed).
- Measure 600 grams of fix into a clean jug, then pour the fix into the middle of the tank and again secure the tank lid. Tip from side-to-side gently for 5 minutes and then pour the fix back into the original bottle. Remember that this chemical is toxic so don’t simply tip it down the sink.
- After this step is complete, the developing tank can be opened and the film can now be exposed to light.
- Place the reel holder and film into a sink with constant, gentle running water for approximately 20 minutes to help wash off any leftover chemicals.
- Take the film/reel out of the water and unroll it from the reel. Put a clip at the bottom and top of the film to help stretch out the film and hang up to dry, remember that the film is still delicate and try not to touch the image part of the film. Use a machine dryer if possible but keep checking the film so that it doesn’t melt, else leave the film to dry naturally.
- Dust is the enemy now so once the drying is complete, the negatives should be cut into strips and stored safely in a negative sleeve.
…and there you have it – a guide on how to process a film! I found film processing a bit tricky at the start but following these simple steps it has become second nature – thankfully!
